

How To Install A Wireless Backup Camera On An Rv
Skip to content 
Step by Step Guide to Install Trailer Wireless Backup Photographic camera System 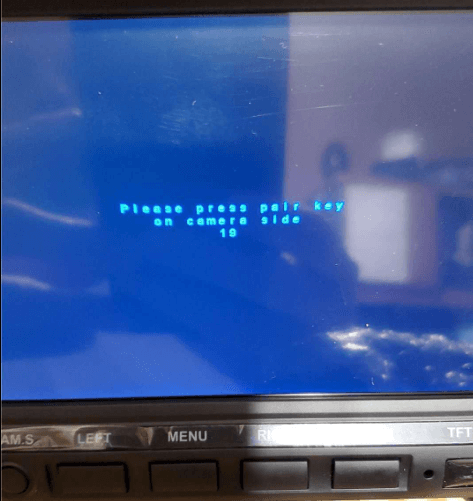

- View Larger Image
Seeing what'south behind you is just as of import equally knowing what'south ahead when y'all're towing.
Information technology is important to bear on driving in the opposite direction when towing a trailer. When moving to the right, drivers must as well learn to process operations as such, particularly when going in reverse, and they need to do so chop-chop.
When you plow the steering wheel to the right, it causes the trailer to go to the other way. Since it combines a directly backstroke and short motion it puts you under a great deal of stress and for a short period of fourth dimension, the Expanded Slalom Pull works you difficult.
Considering a trailer is a long and heavy truck, but side mirrors are used in this operation is way non enough, installing a backup camera is extremely important in guild to prevent risky and deadly accidents.
Fortunately, the procedure of adding a photographic camera to the rear of your RV is not too different from adding a side view RV photographic camera. Nonetheless, there are a couple of primal differences, and nosotros'll bear witness you how to install a rear view RV camera in this post.
Why Installing a Wireless Trailer Backup Photographic camera System?
Simplicity. A wireless backup camera for trailer is considered to exist very easy to use and install, hence its popularity increases over the wired camera systems.
It is much easier to do-it-yourself; you don't really need someone else to mount information technology. Installing wireless system would not need all that many wires compared to a traditional wired system because a wireless system is a simple, plug-and-play system, installation can exist washed in less than fifteen minutes.
Hither are the tools you will need for the installation of the RV backup camera:
-
A drill with a 3/4 bit
-
A screwdriver set
-
Some good RV sealant
Step One: Pairing the Monitor with Camera
Pairing Countdown
Usually, monitors and cameras would be paired together in the factory, they can work simply out of the box. Just before you begin the installation, it is proficient to double bank check again by hooking the unit upward to make sure everything works.
You don't want to go it all installed only to find out yous accept a trouble with pairing.
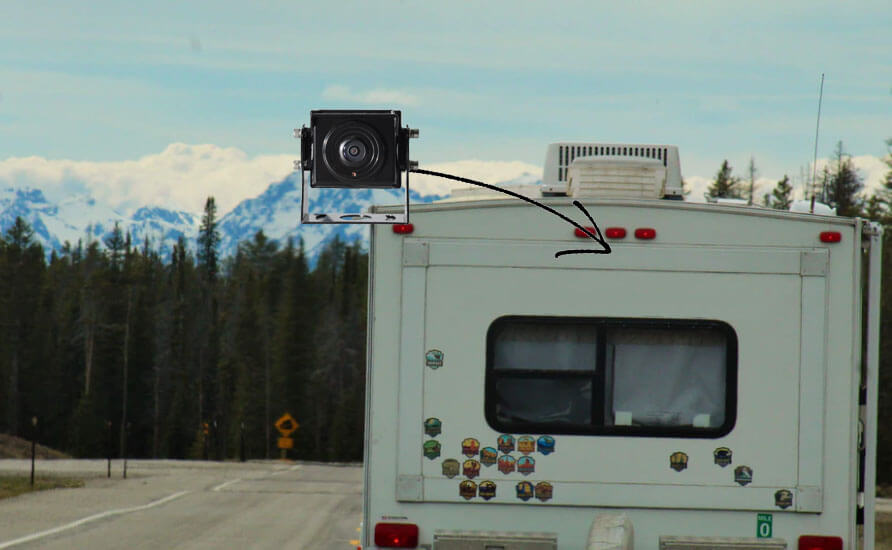
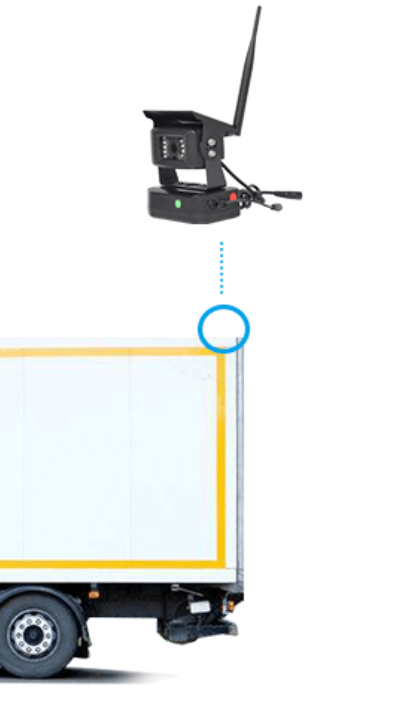
Step Two: Mountain the Monitor & Camera to Correct Location
Mount the monitor in a convenient location that won't block your line of sight while driving. Above the rear view mirror on the dash is the most mutual location.
Adhere the cablevision to the monitor and and so connect information technology to a 12v socket. In about cases, an RV fill-in camera is mounted direct under the clearance lights. Before you start, await upward some examples online. It shouldn't exist an event if your clearance lights are low, but this will vary from rig to rig.
Then align the camera, adhere the cable, and check the viewing angle. Make sure you review your options past adjusting it many times.
Screw the camera into position until you've adamant the best location for information technology. To prevent wet build-up, you'll need to use sealant all over.
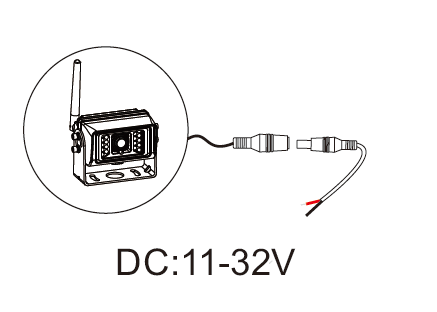
Step Three: Powering Upwardly Your Wireless Camera
Option 1: Your wireless photographic camera'southward power cable should exist connected to your RV's backup light circuit. If necessary, drill a pigsty (then seal it, you do non desire bugs or cold air coming in) or simply go through the hole in the license plate light.
Remove one fill-in bulb and the socket from the vehicle. Connect the camera's ability cable to the fill-in circuit wire in the color of your option. The photographic camera's black lead should be connected to the blackness wire of the seedling excursion, and photographic camera's red wire to ruby-red wire of the bulb circuit.
Attention: Depending on whether your trailer connector is a 7-pivot or 4-pin, the wiring color code will be dissimilar. For 7-pin harnesses, the RV industry uses the RV standard rather than the SAE standard, while for 4-pin harnesses, the SAE standard is normally used.
The YELLOW wire in a 7-pivot connector, for case, is the Auxillary (reverse) wire, while the YELLOW wire in a 4-pin link is for the LEFT TURN signal.
Choice Two: Battery operated wireless backup camera system with a battery pack and magnetic base. Some manufacturers now offer such battery pack with magnetic base, you can attach the wireless photographic camera to the battery pack and then quickly attach information technology to your RV with provided magnetic base of operations.
This makes it a "Truly Wireless" and portable solution which has become the go-to solution for those who wanted one but were put off by the installation process.
Magnets made of loftier-strength neodymium for instant and condom attachment to any make clean, dry, flat metal surface. Usually such battery pack can stream up to 4-6 hours of video on a unmarried accuse, giving you plenty of time to use. Nonetheless, it appears to be a labor-intensive process.
Since the device is wireless, it is not linked to any integrated vehicle system that might turn on or off the camera.
Step Four: Test Everything!
Brand sure the wireless backup camera system is working properly. What are your first impressions? Is the camera's angle correct? Is the monitor in a location that is user-friendly for y'all without any blocking? Cheque the wires once more to ensure that they are all linked and protected properly.
Some wireless camera systems come with a one-year or 2-years warranty and can be continued to three boosted cameras for side views and other purposes.
You could put one on your forepart door or side(Even shifting lanes can be unsafe in a large vehicle, which is why a side camera is essential).

Now, you've just installed a new wireless backup camera on your RV all by yourself. You tin contrary with confidence and enjoy the ride when traveling.
Installing a wireless trailer rear view camera organization is easier if y'all have the right tools and a clear understanding of wiring. So, what are your thoughts?
Volition you mount a fill-in camera on your own or apply someone to practice it for you? Please share this article with all of your RV-loving mates and leave your comments.
Kocchi's is your premier source for all things backup camera and monitor. We're here to assist make sure that you go the all-time quality cameras and monitors y'all need. Go far affect with us to learn more than, or start browsing our wireless camera organization for RV and travel trailers.
Commodity by: Eason
Eason He
Kocchi'due south product manager Eason brings his technical expertise to assist explain vehicle prophylactic products in an easy to understand fashion. Eason loves sharing his noesis of the vehicle camera system and engineering science insights. He is the office of Kocchi's team that knows 'all the things'. He's good at sharing his technical noesis so you tin can do good. BTW, he is an gorging Lego fan!
two Comments
Source: https://www.kocchis.com/blog/how-to-install-trailer-wireless-backup-camera-system-step-by-step-guide/
Posted by: harrisonriseed.blogspot.com
Ordinarily I do not learn post on blogs, but I would similar to
say that this write-up very pressured me to take a look at and practise information technology!
Your writing sense of taste has been surprised me. Thanks, very nice mail.
Thanks for your comment! If possible, send usa some photos after you lot've successfully done it.